Cooking for one sounds simple until you’re standing in the grocery store wondering whether you’ll actually finish that whole bag of spinach.
You buy ingredients for one healthy lunch, use a handful of everything, and spend the next few days trying to figure out what to do with the leftovers. Or you meal prep five identical containers, only to start craving something different by Wednesday.
This vegetarian meal prep for one plan takes a simpler approach.
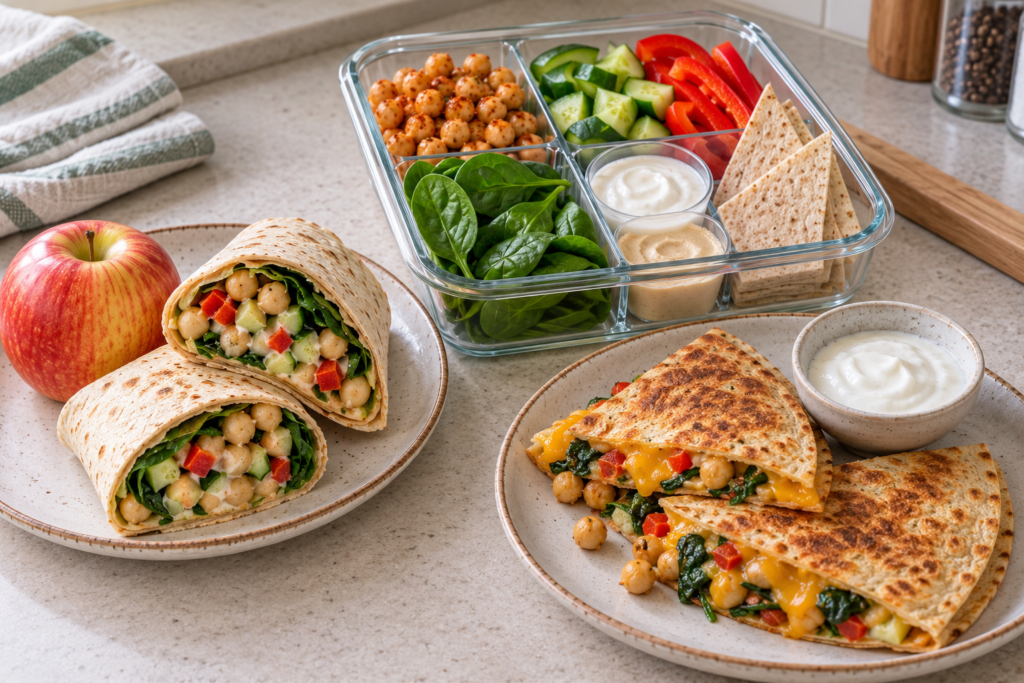
Instead of preparing three identical meals, you’ll use one small grocery list to make three different vegetarian lunches: a creamy chickpea wrap, a crunchy lunch box, and a warm, cheesy quesadilla.
The idea is to prep your ingredients once, store them separately, and put each lunch together when you’re ready to eat. You’ll spend less time figuring out what to make and have a better chance of using the groceries you bought.
No complicated recipes. No huge batch-cooking session. Just a manageable three-day lunch plan for one person.
Your 3-Day Vegetarian Meal Prep Plan
| Day | Lunch | Estimated finishing time |
|---|---|---|
| Day 1 | Chickpea Wrap + Apple | 5 min |
| Day 2 | Chickpea Veggie Box | 5 min |
| Day 3 | Chickpea Spinach Quesadilla | 8–10 min |
Shared ingredient prep: Approximately 20 minutes.
Servings: Three separate lunches, each serving one person.
Cooking required: Only for the Day 3 quesadilla, unless you choose to toast the tortilla wedges on Day 2.
These times are planning estimates and may vary with your chopping speed, kitchen equipment, and preparation routine.
Why This Vegetarian Meal Prep for One Works
You don’t have to eat the same thing every day. The chickpeas, vegetables, tortillas and yogurt appear in different combinations, so each lunch feels like a different meal.
The shopping list stays manageable. Instead of buying ingredients for three unrelated recipes, you’ll reuse the same core groceries across several days.
There’s very little cooking. Two lunches can be eaten cold. The third only needs a skillet and a few minutes of heating.
You can adjust the portions. These are moderate-sized lunches, so you can add a side of fruit, whole-grain crackers, extra vegetables or another protein source if you need something more substantial.
You don’t need fancy meal-prep equipment. A few small containers, a knife, a cutting board and a skillet are enough.
Most importantly, it’s a plan you can repeat and adapt without turning Sunday into an exhausting cooking project.
Grocery List for Three Vegetarian Lunches
Here is everything you’ll need.
Fresh produce
- 1 medium bell pepper, yielding approximately 1 cup chopped
- 2 small Persian cucumbers, yielding approximately 1 cup chopped
- 2 loosely packed cups baby spinach
- 1 medium apple
- 1 lemon (you’ll use approximately 1 tablespoon of juice)
Canned and packaged ingredients
- 1 can chickpeas (15–15.5 oz), aiming for 1½ cups drained and rinsed
- 3 medium flour tortillas (approximately 8 inches each)
- 4 tablespoons classic hummus
- 1 individual cup plain nonfat Greek yogurt (5.3 oz or 150 g)
- ¼ cup shredded cheddar cheese
Pantry ingredients
- 1 teaspoon olive oil
- ¼ teaspoon garlic powder
- ¼ teaspoon smoked paprika
- ⅛ teaspoon ground cumin
- Salt and black pepper, to taste
Shopping tip: Check how much your can of chickpeas yields after draining. If you have slightly less than 1½ cups, divide what you have evenly among the three lunches rather than opening a second can for a few extra spoonfuls.
You may still have tortillas, hummus or cheese left in the packages you purchase. That’s okay. The goal is to reduce unnecessary waste, not pretend that every grocery package contains exactly three servings.
How to Prep Everything Ahead
Set aside approximately 20 minutes when you’re not rushing.
You aren’t making three complete lunches now. You’re getting the ingredients ready so that the daily assembly takes much less effort.
Step 1: Wash and prepare the produce
Wash the bell pepper, cucumbers, apple and lemon under running water.
Chop the pepper into small pieces and measure 1 cup. Chop the cucumbers into bite-sized pieces and measure 1 cup.
Keep the spinach dry and refrigerated until needed.
Leave the apple whole until Day 1 so it stays fresh.
Step 2: Drain and divide the chickpeas
Open the can of chickpeas, drain it, and rinse the chickpeas under cool running water.
Measure approximately ½ cup into each of three separate airtight containers.
You can lightly mash the chickpeas for Day 1 and Day 3 when you’re ready to assemble those meals. Keeping them whole during storage makes it easier to use them in different ways.
Step 3: Divide the vegetables
Use this simple portion guide:
| Ingredient | Day 1 | Day 2 | Day 3 |
|---|---|---|---|
| Chickpeas | ½ cup | ½ cup | ½ cup |
| Bell pepper | ¼ cup | ½ cup | ¼ cup |
| Cucumber | ⅓ cup | ⅔ cup | — |
| Baby spinach | ½ cup | ½ cup | 1 cup |
| Tortilla | 1 | 1 | 1 |
| Hummus | 2 Tbsp | 2 Tbsp | — |
| Greek yogurt | 2 Tbsp | ¼ cup | ¼ cup |
| Cheddar | — | — | ¼ cup |
The Greek yogurt quantities total approximately one 150 g cup; spoon measurements and actual package yields can vary slightly.
Keep chopped vegetables in separate covered containers, or use a compartmentalized meal-prep container.
Step 4: Set aside your seasonings
You don’t need to make three different dressings ahead of time.
Just keep the lemon, garlic powder, smoked paprika, cumin, salt and pepper ready to use.
Adding seasonings and yogurt when you assemble the lunches helps keep the flavors fresh and the vegetables from becoming watery.
Step 5: Refrigerate everything
Put the prepared chickpeas and vegetables into the refrigerator promptly.
Keep the tortillas sealed separately, the hummus and yogurt refrigerated, and the spinach dry.
That’s it. Your main preparation session is finished.
Now you’re ready for three different lunches.
Day 1: Creamy Lemon-Chickpea Wrap
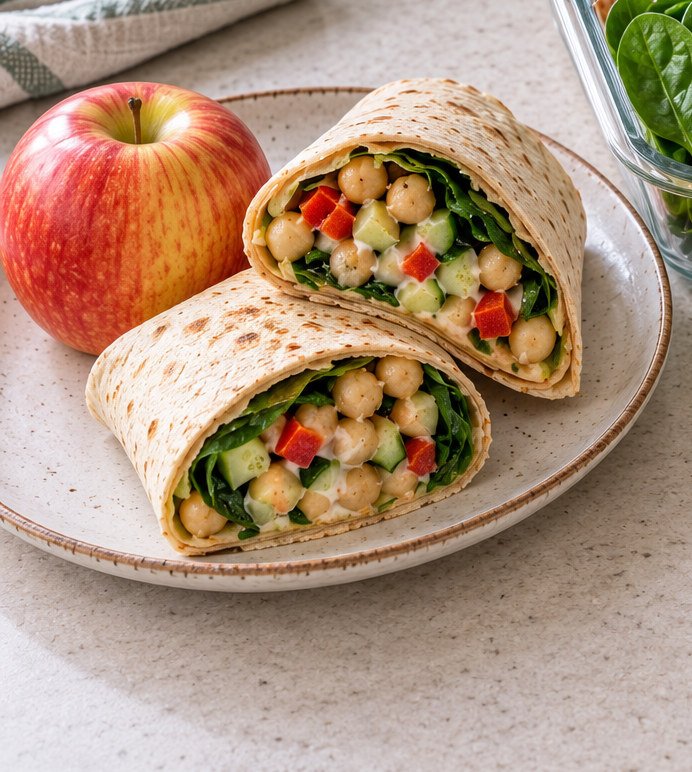
This easy vegetarian wrap combines creamy chickpeas, hummus and crisp vegetables for a satisfying lunch that doesn’t require cooking.
It’s a good option when you need something quick between meetings or want a simple lunch at home.
Ingredients — 1 serving
- 1 medium flour tortilla (8-inch)
- ½ cup drained chickpeas
- 2 tablespoons classic hummus
- 2 tablespoons plain Greek yogurt
- ½ cup baby spinach
- ¼ cup chopped bell pepper
- ⅓ cup chopped cucumber
- 1 teaspoon lemon juice
- ⅛ teaspoon garlic powder
- Black pepper, to taste
- 1 medium apple, for serving
Instructions
- Place the chickpeas in a small bowl and lightly mash them with a fork. Leave some chickpeas chunky for texture.
- Stir in the lemon juice, garlic powder and a little black pepper.
- Lay the tortilla flat and spread the hummus over the center.
- Add the spinach, seasoned chickpeas, bell pepper and cucumber.
- Spoon the Greek yogurt over the filling, or keep it on the side as a dip if you’re packing lunch for later.
- Fold the sides inward and roll the tortilla tightly.
Serve with a fresh apple.
Lazy kitchen tip: If your tortilla feels too full, serve some of the cucumber and pepper alongside the wrap instead of forcing everything inside.
Make-ahead tip: Keep the filling and tortilla separate until lunchtime to help prevent a soggy wrap.
Day 2: Smoky Chickpea & Crunchy Veggie Lunch Box
If you enjoy a lunch that you can snack on piece by piece, this one is for you.
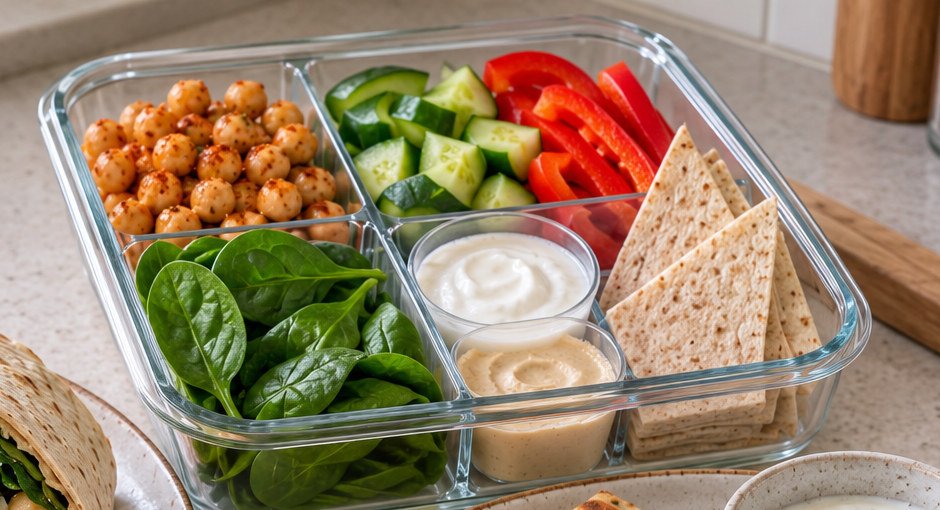
Think crunchy cucumbers, sweet bell peppers, smoky chickpeas, creamy dips and tortilla wedges—all packed into one lunch box.
It’s a simple no-cook vegetarian lunch that feels different from yesterday’s wrap.
Ingredients — 1 serving
- ½ cup drained chickpeas
- ½ cup chopped bell pepper
- ⅔ cup chopped cucumber
- ½ cup baby spinach
- 1 medium flour tortilla
- 2 tablespoons hummus
- ¼ cup plain Greek yogurt
- 1 teaspoon lemon juice
- ⅛ teaspoon smoked paprika
- Black pepper, to taste
Instructions
- Put the chickpeas in a bowl and toss with the smoked paprika, lemon juice and black pepper.
- Place the chickpeas in one section of your lunch container.
- Arrange the chopped cucumber, bell pepper and spinach in separate sections.
- Add the hummus and Greek yogurt to small, leakproof containers for dipping.
- Cut the tortilla into wedges and pack them separately.
Eat the chickpeas and vegetables with the dips, using the tortilla wedges to scoop up your favorite combinations.
Optional variation: If you’re eating at home, warm the tortilla in a dry skillet and cut it into wedges just before serving.
Packing tip: Keep the tortilla and dips separate from the vegetables until you’re ready to eat. The textures will be much better.
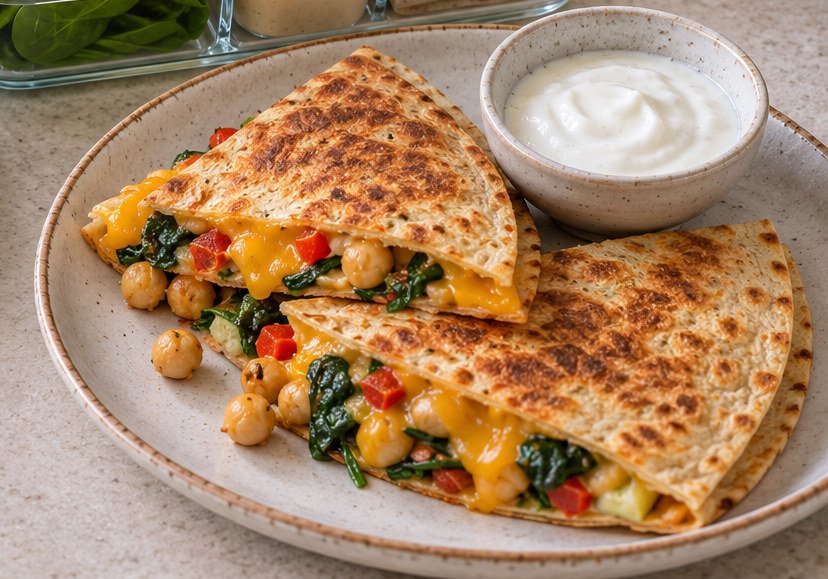
Day 3: Cheesy Chickpea & Spinach Quesadilla
By Day 3, you might be ready for something warm.
This quick vegetarian quesadilla turns the remaining chickpeas, spinach and bell pepper into a golden, cheesy lunch.
The ingredients are already measured and prepped, so you only need a skillet and a few minutes to put everything together.
Ingredients — 1 serving
- 1 medium flour tortilla (8-inch)
- ½ cup drained chickpeas
- 1 cup baby spinach
- ¼ cup chopped bell pepper
- ¼ cup shredded cheddar cheese
- ¼ cup plain Greek yogurt, for dipping
- 1 teaspoon olive oil
- 1 teaspoon lemon juice
- ⅛ teaspoon ground cumin
- ⅛ teaspoon smoked paprika
- ⅛ teaspoon garlic powder
- Black pepper, to taste
Instructions
- Lightly mash the chickpeas in a small bowl with the lemon juice, cumin, smoked paprika, garlic powder and black pepper.
- Heat the olive oil in a nonstick skillet over medium heat.
- Add the chopped bell pepper and cook briefly until it begins to soften.
- Stir in the seasoned chickpeas and spinach. Cook until the spinach wilts and the chickpeas are heated through.
- Transfer the filling to a plate. Place the tortilla in the skillet, arranging the filling over one half.
- Sprinkle the shredded cheddar over the filling and fold the tortilla in half.
- Cook until the outside turns golden and the cheese melts, flipping carefully as needed.
- Cut into triangles and serve with the Greek yogurt.
Easy variation: Add a pinch of chili flakes or a little hot sauce if you enjoy spice.
Busy-day tip: If you’re taking this to work, prepare the quesadilla at home, cool and refrigerate it promptly, then transport it chilled. Reheat thoroughly at lunchtime if heating facilities are available.
How to Store Your Vegetarian Meal Prep Safely
Meal prep is only useful if the ingredients stay safe to eat.
Keep your refrigerator at 40°F (4°C) or below. Refrigerate perishable ingredients promptly, and don’t leave them at room temperature for more than two hours—or more than one hour when the temperature is above 90°F.
For this three-day plan:
- Keep drained chickpeas in covered refrigerated containers.
- Store chopped cucumber and bell pepper separately.
- Keep spinach dry and refrigerated.
- Refrigerate hummus, yogurt and cheese according to their package directions.
- Store tortillas sealed and away from moist fillings.
- Assemble cold lunches close to the time you plan to eat them.
- Heat the Day 3 quesadilla thoroughly. If reheating a previously cooked leftover, heat it to 165°F.
USDA guidance generally recommends using properly refrigerated cooked leftovers within three to four days. Always follow any shorter product-specific storage instruction and discard food that has been stored improperly.
If you’re taking lunch to work or school, use a refrigerator when available. Otherwise, pack perishable foods in an insulated lunch bag with at least two cold sources.
For more guidance, see the USDA’s Leftovers and Food Safety and Keeping Bag Lunches Safe resources.
How to Avoid Wasting Leftover Groceries
One of the biggest frustrations of cooking for one is buying a package when you only need a small amount.
Here are a few easy ways to make this plan work better.
Extra tortillas: Keep them sealed and follow the package’s storage instructions. Freeze extras if your brand permits it.
Leftover hummus: Use it as a spread in another wrap, a dip for carrots, or a quick addition to a snack plate.
Remaining spinach: Add it to scrambled eggs, a breakfast sandwich, soup or a quick pasta dinner before it loses its freshness.
Extra cheddar: Use it in another quesadilla, a grilled cheese sandwich or an omelet. You can also freeze it if appropriate for the product.
Unused cucumber or bell pepper: Slice them for a snack, add them to a salad or pair them with hummus.
You don’t need to finish every purchased package in three days. Just make a plan for the ingredients that remain and store them safely.
That’s what makes small-scale meal prep genuinely practical.
Have extra chickpeas and an apple? Try our 10-Minute Fall Apple Chickpea Salad for another quick vegetarian lunch that makes good use of ingredients you already have.
Easy Ingredient Swaps
Don’t have exactly the ingredients listed? You can make a few changes without losing the basic idea.
For a dairy-free version: Use a dairy-free yogurt alternative and plant-based cheese. Choose versions that work well in savory meals, and remember that their protein content may be different.
For gluten-free lunches: Replace the flour tortillas with a suitable gluten-free tortilla. Check packaging for your dietary needs.
For a different protein source: Use drained white beans instead of chickpeas, adjusting the texture and seasoning as needed.
For more vegetables: Add shredded carrots or tomatoes at assembly time. Avoid putting watery ingredients into a wrap too far ahead.
For a more substantial lunch: Add an extra side, such as fruit, crackers or another protein-containing food, according to your needs.
These substitutions may change the cost, timing and nutrition.
Estimated Nutrition Per Lunch
These are approximate values based on representative U.S. grocery-product nutrition labels and standard produce estimates.
| Lunch | Calories | Protein |
|---|---|---|
| Creamy Lemon-Chickpea Wrap with Apple | Approximately 460 | Approximately 16 g |
| Smoky Chickpea & Crunchy Veggie Lunch Box | Approximately 395 | Approximately 19 g |
| Cheesy Chickpea & Spinach Quesadilla | Approximately 460–470 | Approximately 22–23 g |
These values are estimates, not laboratory-tested measurements. Tortilla size, drained chickpea yield, hummus, cheese, yogurt and optional additions can change the results.
Vegetarian Meal Prep for One: Frequently Asked Questions
Can I make all three lunches on Sunday?
You can prepare the shared ingredients in advance, but I recommend storing components separately rather than fully assembling every meal.
This helps protect the texture of the wrap and keeps the vegetables crisp. Prepare the quesadilla fresh on Day 3 when possible.
How long does vegetarian meal prep for one take?
This plan is designed around approximately 20 minutes of shared ingredient preparation, followed by about five minutes to assemble each cold lunch or eight to ten minutes to prepare the quesadilla.
Your actual time will depend on your kitchen setup and how quickly you chop and assemble the ingredients.
Is this a high-protein vegetarian meal prep plan?
The lunches contain protein from chickpeas, Greek yogurt, hummus and cheese, but the calculated amounts vary by meal.
Rather than labeling every lunch “high protein,” I prefer to show the estimated protein content so you can decide whether the portions suit your needs.
You can increase portions or add another protein source if desired.
Can I make this meal prep plan vegan?
Yes, with substitutions. Use dairy-free yogurt and plant-based cheese, and make sure your tortillas and other packaged ingredients are vegan.
The final taste and nutritional values will vary depending on the products you choose.
What if I don’t want to cook on Day 3?
You can turn the quesadilla ingredients into another cold wrap.
Mash the chickpeas, add the chopped pepper and spinach, and use your preferred cheese and yogurt as a filling or dip.
You won’t get the warm, melted-cheese texture, but you’ll still have a quick vegetarian lunch.
Is this meal prep suitable for work lunches?
Yes, especially the wrap and lunch box, provided you keep perishable ingredients properly chilled.
The quesadilla is most convenient if you have access to a skillet at home or a way to reheat it safely at work.
How can I make meal prep cheaper for one person?
Start by checking what’s already in your refrigerator and pantry.
If you have tortillas, beans, vegetables or suitable dips available, use those before buying something new.
Plan around shared ingredients, compare grocery package sizes, and avoid purchasing large containers just because the price per ounce looks lower. A large package isn’t a bargain if much of it goes to waste.
Your Simple 3-Day Meal Prep Checklist
Use this quick checklist to keep the week organized.
Before the week begins
- Check your pantry and refrigerator.
- Buy the ingredients you’re missing.
- Wash and chop the vegetables.
- Drain and divide the chickpeas into three portions.
- Portion the hummus, yogurt and cheese.
- Refrigerate everything promptly.
Day 1
- Assemble the creamy chickpea wrap.
- Pack the apple.
- Keep the wrap chilled if taking it to work.
Day 2
- Season the chickpeas with paprika and lemon.
- Pack the crunchy vegetables.
- Add hummus and yogurt dips.
- Pack tortilla wedges separately.
Day 3
- Heat the chickpea and vegetable filling.
- Cook the cheddar quesadilla.
- Serve with yogurt dip.
- Check your refrigerator for remaining ingredients that need to be used.
Make Vegetarian Meal Prep Work for Your Life
Meal prep doesn’t have to mean an entire Sunday in the kitchen or five containers of identical food.
Sometimes all you need is a can of chickpeas, a few vegetables, some tortillas and a simple plan.
This three-day vegetarian meal prep for one gives you a starting point without committing to a complicated routine. You can change the ingredients, repeat your favorite lunch or use the same method with different flavors next week.
And if you have a particularly busy day, that’s the real benefit: you already know what lunch is going to be.
Save this three-day plan for your next grocery trip, and explore more quick and easy vegetarian recipes on The Lazy Veggie Bowl.
Shruti | The Lazy Veggie Bowl
Nutrition information, when provided, is an estimate and can vary depending on the brands, quantities and optional toppings used.
Some images on The Lazy Veggie Bowl may be AI-generated for illustration.